Measuring for a new splashback for your kitchen or bathroom can seem like a difficult process, but in reality, it's quite simple. There are some important factors to note before embarking on the task, however, to ensure you get accurate dimensions and the correct fit when it comes to installing your splashback.
For most areas, particularly in kitchens, fitting a splashback is as easy as measuring a rectangular shape but sometimes there are trickier spaces, such as bathrooms or around plug sockets, that require a bit more work. Our measuring guide removes all the doubt to help guide you through the process.
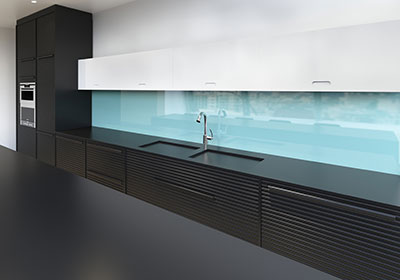
Measuring for a rectangular splashback
Rectangular splashbacks are the most common and easiest to measure for but remember to measure all sides as most cabinets, worktops and walls are not built or fitted perfectly square. This can mean you end up with a small variation between measurements - we recommend taking more than one measurement to be sure and choosing the shortest of the two.
For a more precise fit, we advise letting us know the area where the measurements taper along with the height at both sides. For your width measurements, as with height, be sure to check both sides accurately as there can often be a variation between the measurements.
Another factor that you need to allow for is expansion, as most kitchen units are made from wood which can expand and contract depending on the conditions of your home, such as moisture in the air or heat. We recommend allowing a 2mm gap from any edges where the splashback meets an object or the wall for this, as too tight a fit might result in damage to the splashback or difficulty installing it. Don't forget, it is possible to sand the acrylic down if there is a slightly too tight fit.
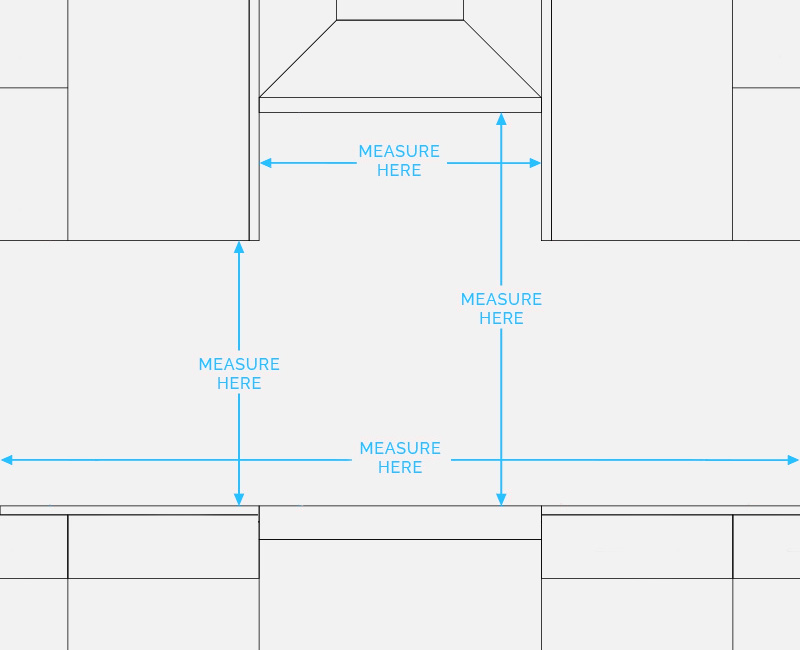
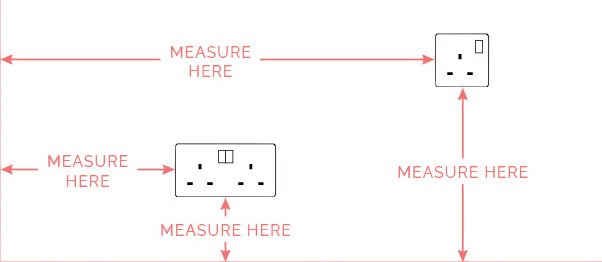
Measuring plug sockets
When measuring for sockets or other cutouts, measure the height from the base and side as shown below. It's advisable to upload a sketch when you place your order so that we can see clearly where cutouts need to be made. Don't worry, it can be a hand-drawn sketch, or you can use our templates.
Note that if you have an induction or electric hob, a continuous acrylic splashback can be used providing there is a 50mm gap between the panel and the hob. However, if you have a gas hob, you'll need to order a glass splashback for this area as the gas will make the acrylic too hot, and it may start to melt.
Measuring for acrylic and glass panels
If you're measuring for multiple panels, you can approach the measurement process in the same way as before but draw out your plan on a piece of paper and include any obstacles that will need to be cut out. Label each panel on your sketch, starting from the left and labelled as A, B, C and so on, so that we can determine the correct order of the panels and ensure that patterns or images flow correctly. You can use our templates to help you with this.
Remember to leave a 2mm gap on the top, bottom and each side of the panel - this deduction should be taken for all areas where the panel runs to a corner or against a cupboard or surface. Where the panel meets another panel, you'll need to deduct 2mm for each panel edge, giving a 4mm gap in all.
Measuring for internal corners
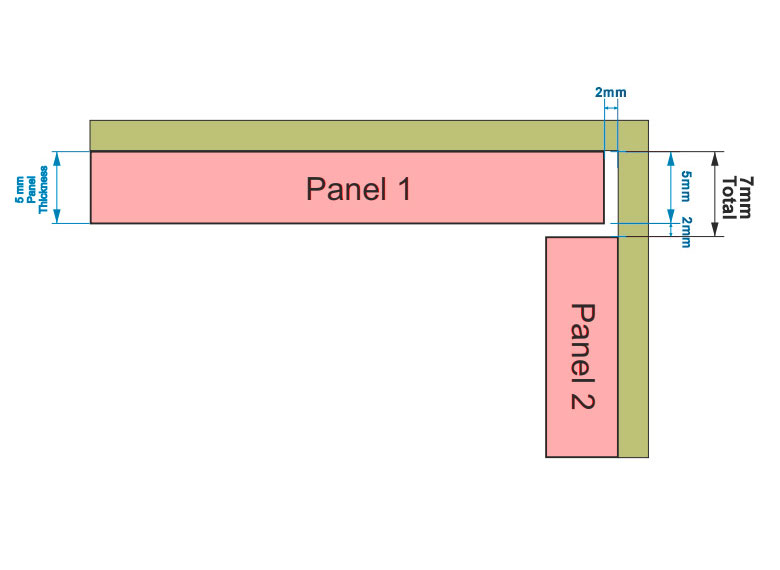
Measuring for the internal corner joints of your splashback may feel like the most difficult part of the whole process, but it doesn't need to be. There are two ways of achieving a neat result for your corners.
Overlap joints allow one panel to overlap the next-the method is great for minimising the need for additional silicone filling. As shown in the diagram, ensure a 2mm expansion gap has been deducted from the side of your first panel and then deduct the thickness of your second panel and deduct an extra 2mm from this measurement.
For butt joints, you have more adjustment when it comes to fitting your panels. Once fitted, the spaces can be filled with silicone for the smoother finish. This method is best suited to use with corner trims. Deduct the thickness of the panel from the side of your first panel which is being installed into the corner, then deduct a 2mm gap. Next, deduct the thickness of the panel from your second panel which meets in the corner and allow the usual 2mm gap from this measurement as well.
Butt Joints
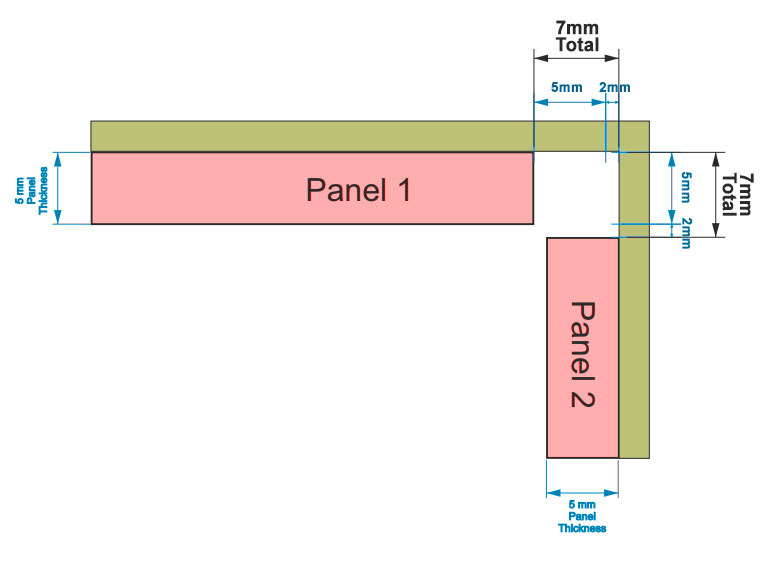
Overlap Joints
Our Sample Service
Order a sample of any of our products before you buy to make sure the colour is exactly what you're looking for
Contact us for any queries at info@cutmy.co.uk or 01903 389024